How to Launch SuperScan
- In the Local System Devices list, select a physical device that contains your data. It may be a fixed disk or a removable disk.
- To open the SuperScan Options dialog box, do one of the following:
- In the toolbar, click SuperScan

- Right-click the physical device node and choose SuperScan from the context menu.

- To select a named area, from the Scan what drop-down list, choose the area you want to scan. Choose either the [Whole Disk's Surface], or a named area.
- To select an area manually, type the starting sector number in the From sector field and the number of sectors in the sectors field.
- In the Analyze and Detect Partitions area, select the check boxes next to the partition types that you want to look for. Clear the check boxes next to the partitions that you do not want to look for. If you select all four partition types, the scanning takes a longer time and you may find more recoverable data.
- If a disk has been severely damaged and partitions and files are not found, you may turn on the File types to be recognized based on signatures option.
Provided that the files are not fragmented, Active@ Scan technology would detect the file signatures and would try to recover accidentally deleted files of certain types.
The detected files, when this option is turned on, will be placed into the Files Recognized by Signatures virtual folder and will have abstract filenames (because no file header could be detected, only file data), however their content can be valid.
You may try to recover your files, documents or images, from the Files Recognized by Signatures virtual folder later on.
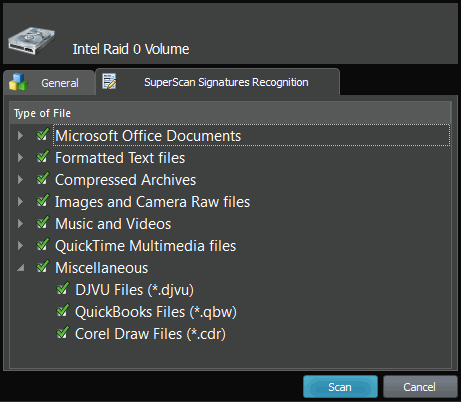
The None option means that no signatures recognition will be applied, it will speed up the SuperScan process a bit. The All option instructs SuperScan to recognize all possible supported signatures.
The Some option lets you choose the file types you want to recognize based on signatures and recover them later on. Click the Select All button to apply a filter:
- Click Start.
- The progress bar appears in the bottom left corner. There is nothing more for you to do until the device scan is finished. To cancel the operation at anytime, in the toolbar, click Stop:

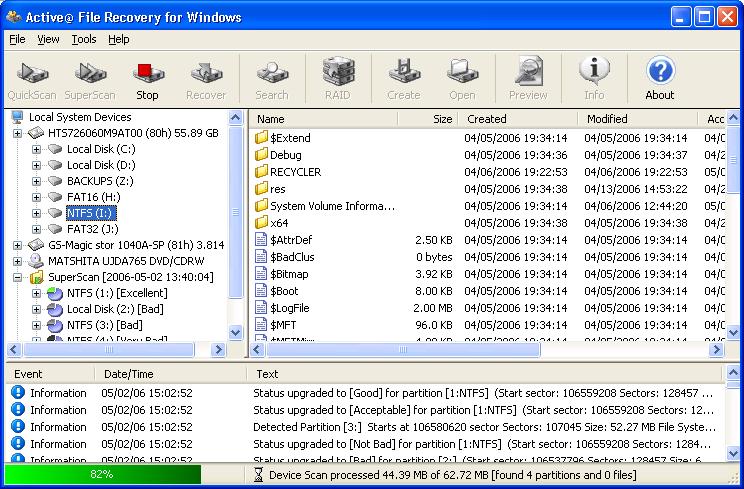
After the device scan completes, SuperScan displays a new virtual folder with the name "SuperScan" and a date and time stamp. The contents of this folder is displayed in the right panel. You may treat this new folder and its contents the same way that you treat other device nodes in the list. You may follow the same steps to scan the folder, then search for files and folders to be recovered.