April 8 2019, LSoft team
Failed RAID 0’s can have potentially a disastrous effect on data security. If the RAID controller has stopped working or there was a software RAID emulator error, then there is a very good chance to recover all your files. However, if one of the disks has malfunctioned then only a recovery of smaller files might be possible. In that scenario, the maximum size of the files can be the size of the block (for example, 256KB). Since parts of every individual file are being spread across two disks, if the file’s size is bigger than the size of the block then recovery is highly unlikely.
In our case, we will be dealing with a RAID 0 setup where controllers on both disks have failed. Therefore, the files on those disks are not accessible (although they are still there) and we will have to virtually recreate the RAID in order to access them.
To recover RAID 0 setup for this occasion we will be using File Recovery Professional.
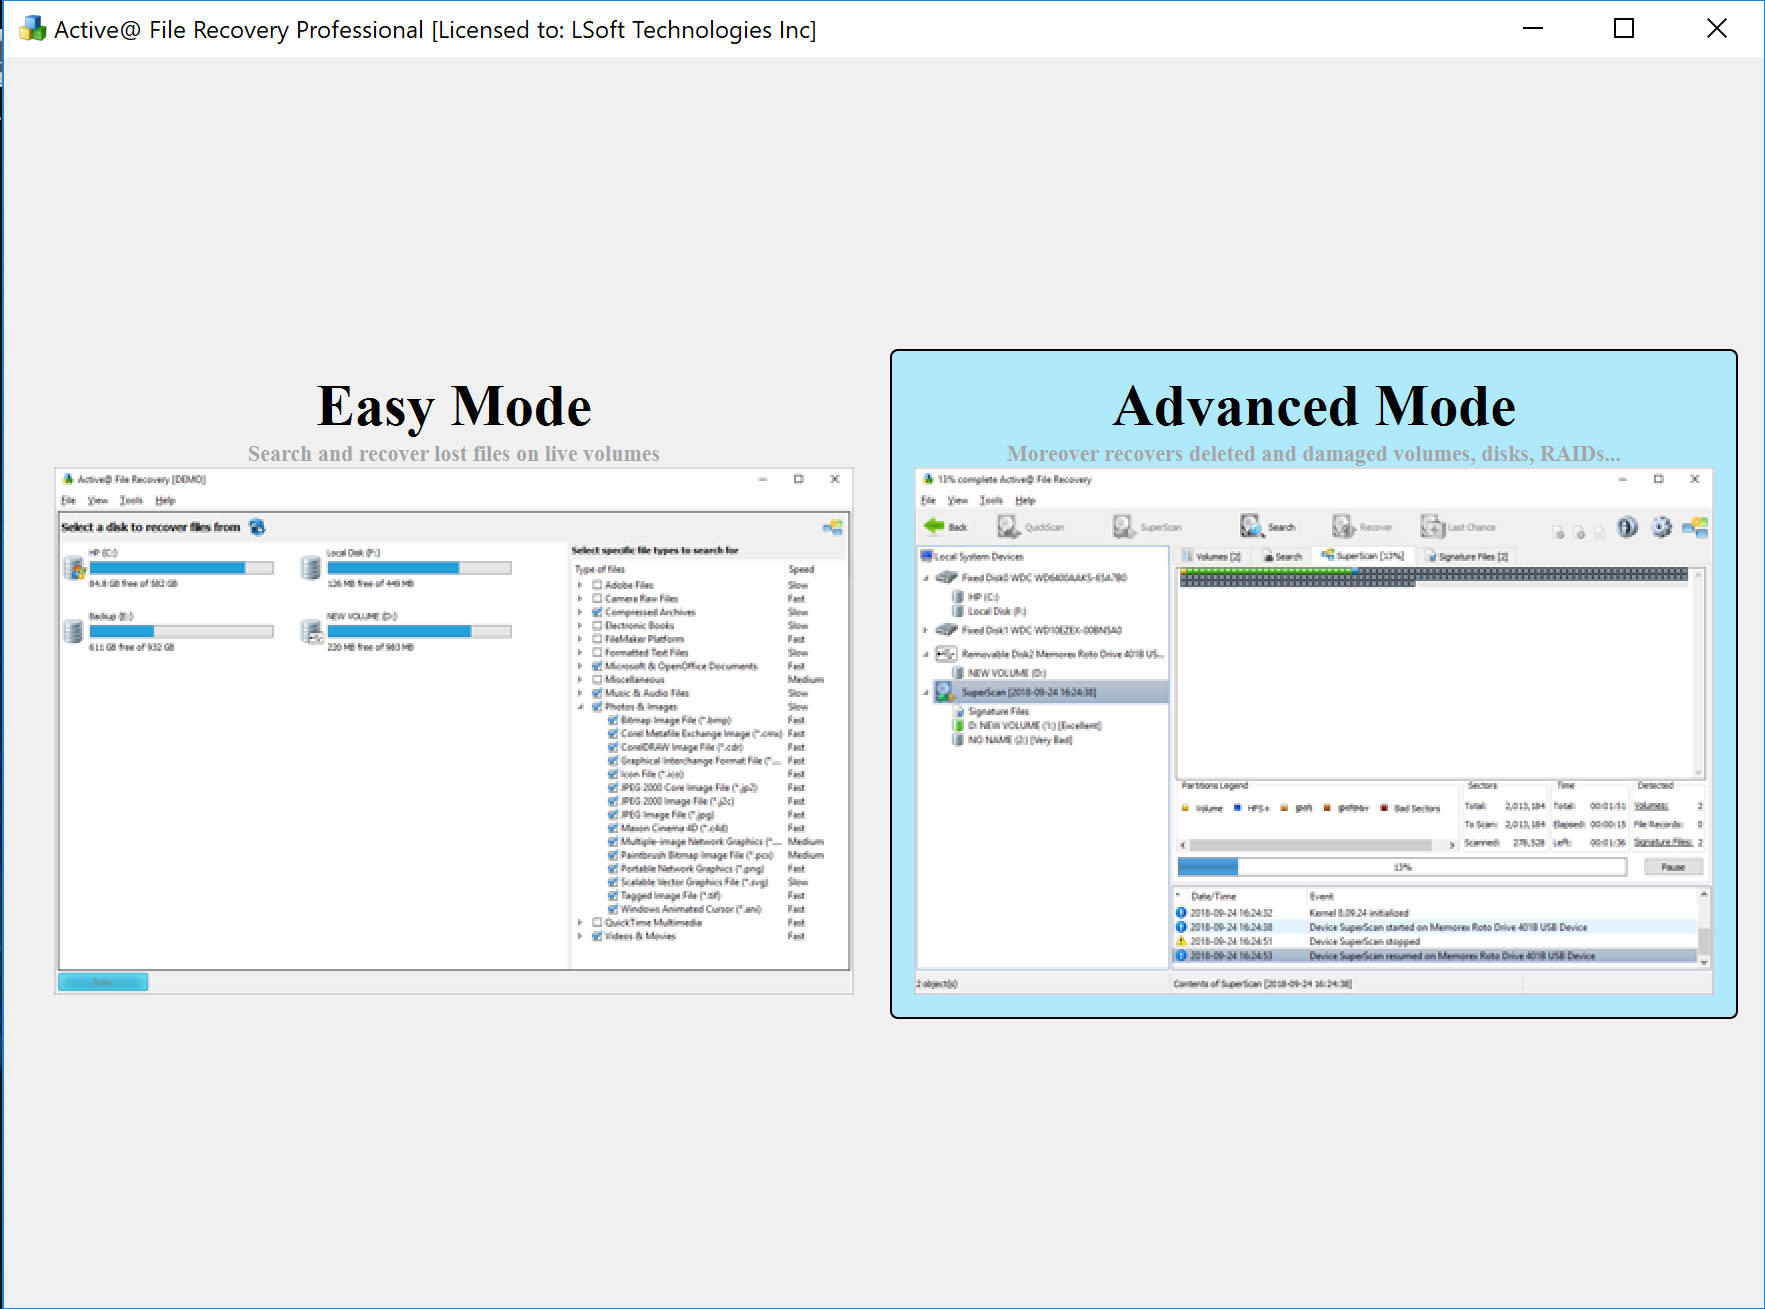
At the opening screen, we will choose Advanced mode.
What we first need to do is scan both RAID 0 drives and then create their resected images. After that, we will need to open them with File Recovery software.
To open the images that we just created we will click on File in the upper left corner and then Open Image
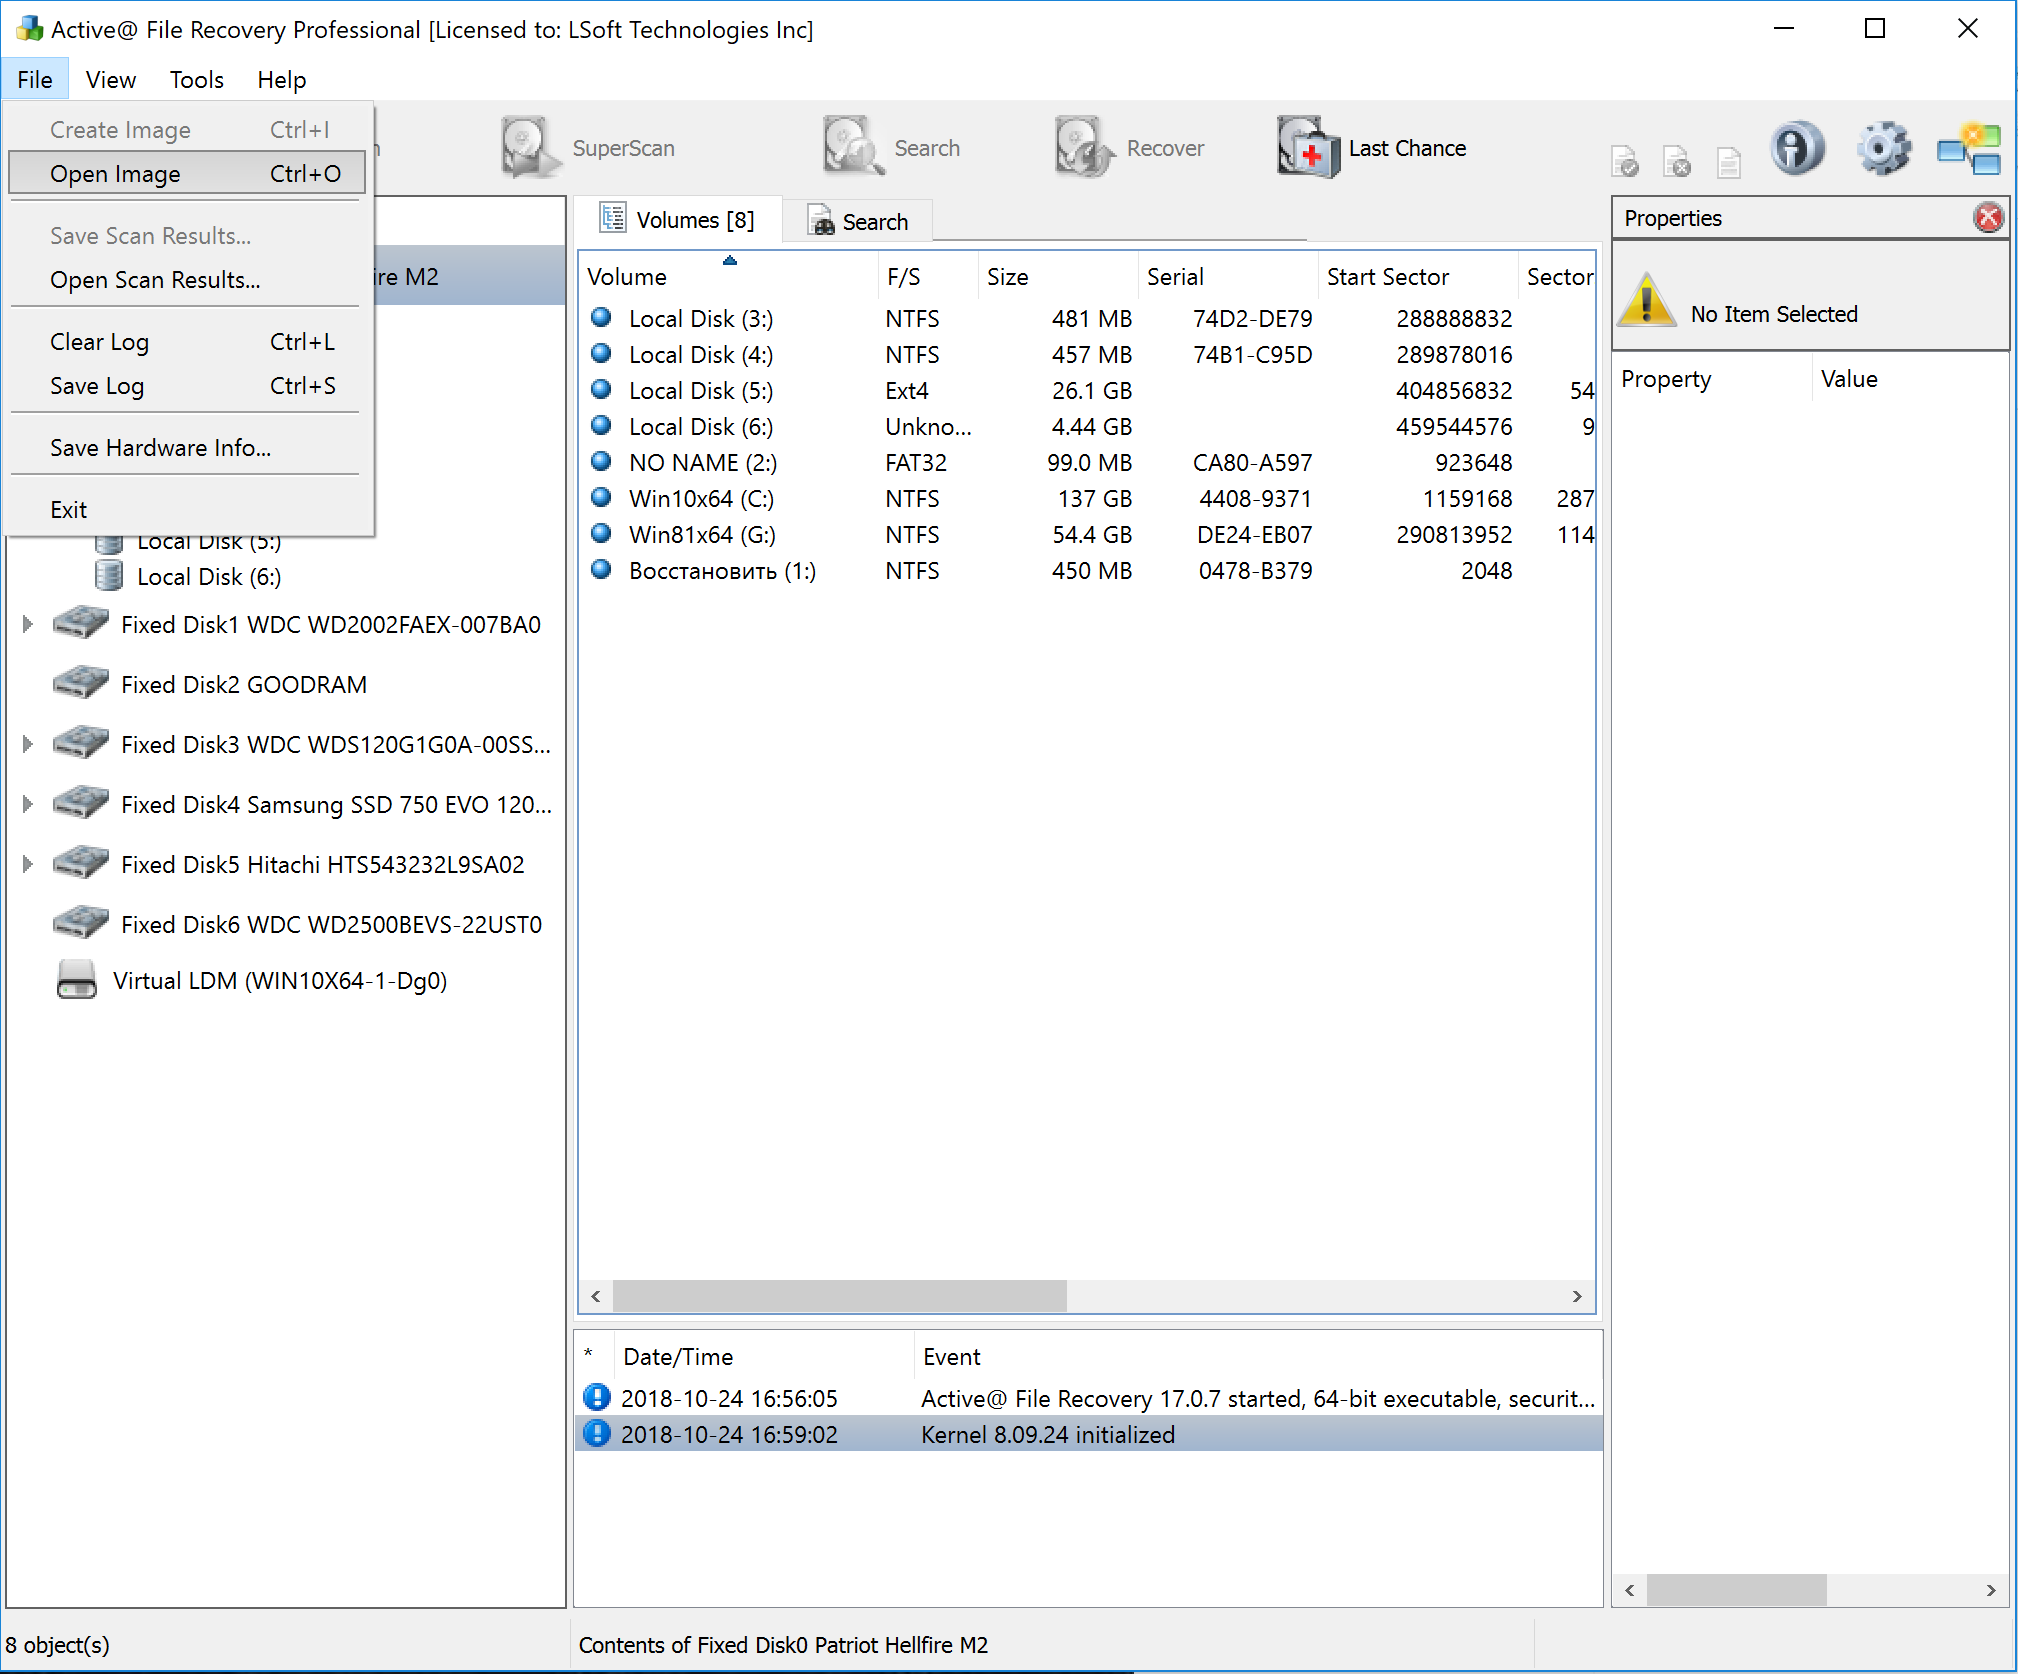
After opening them we can see them in the bottom corner of the left panel.
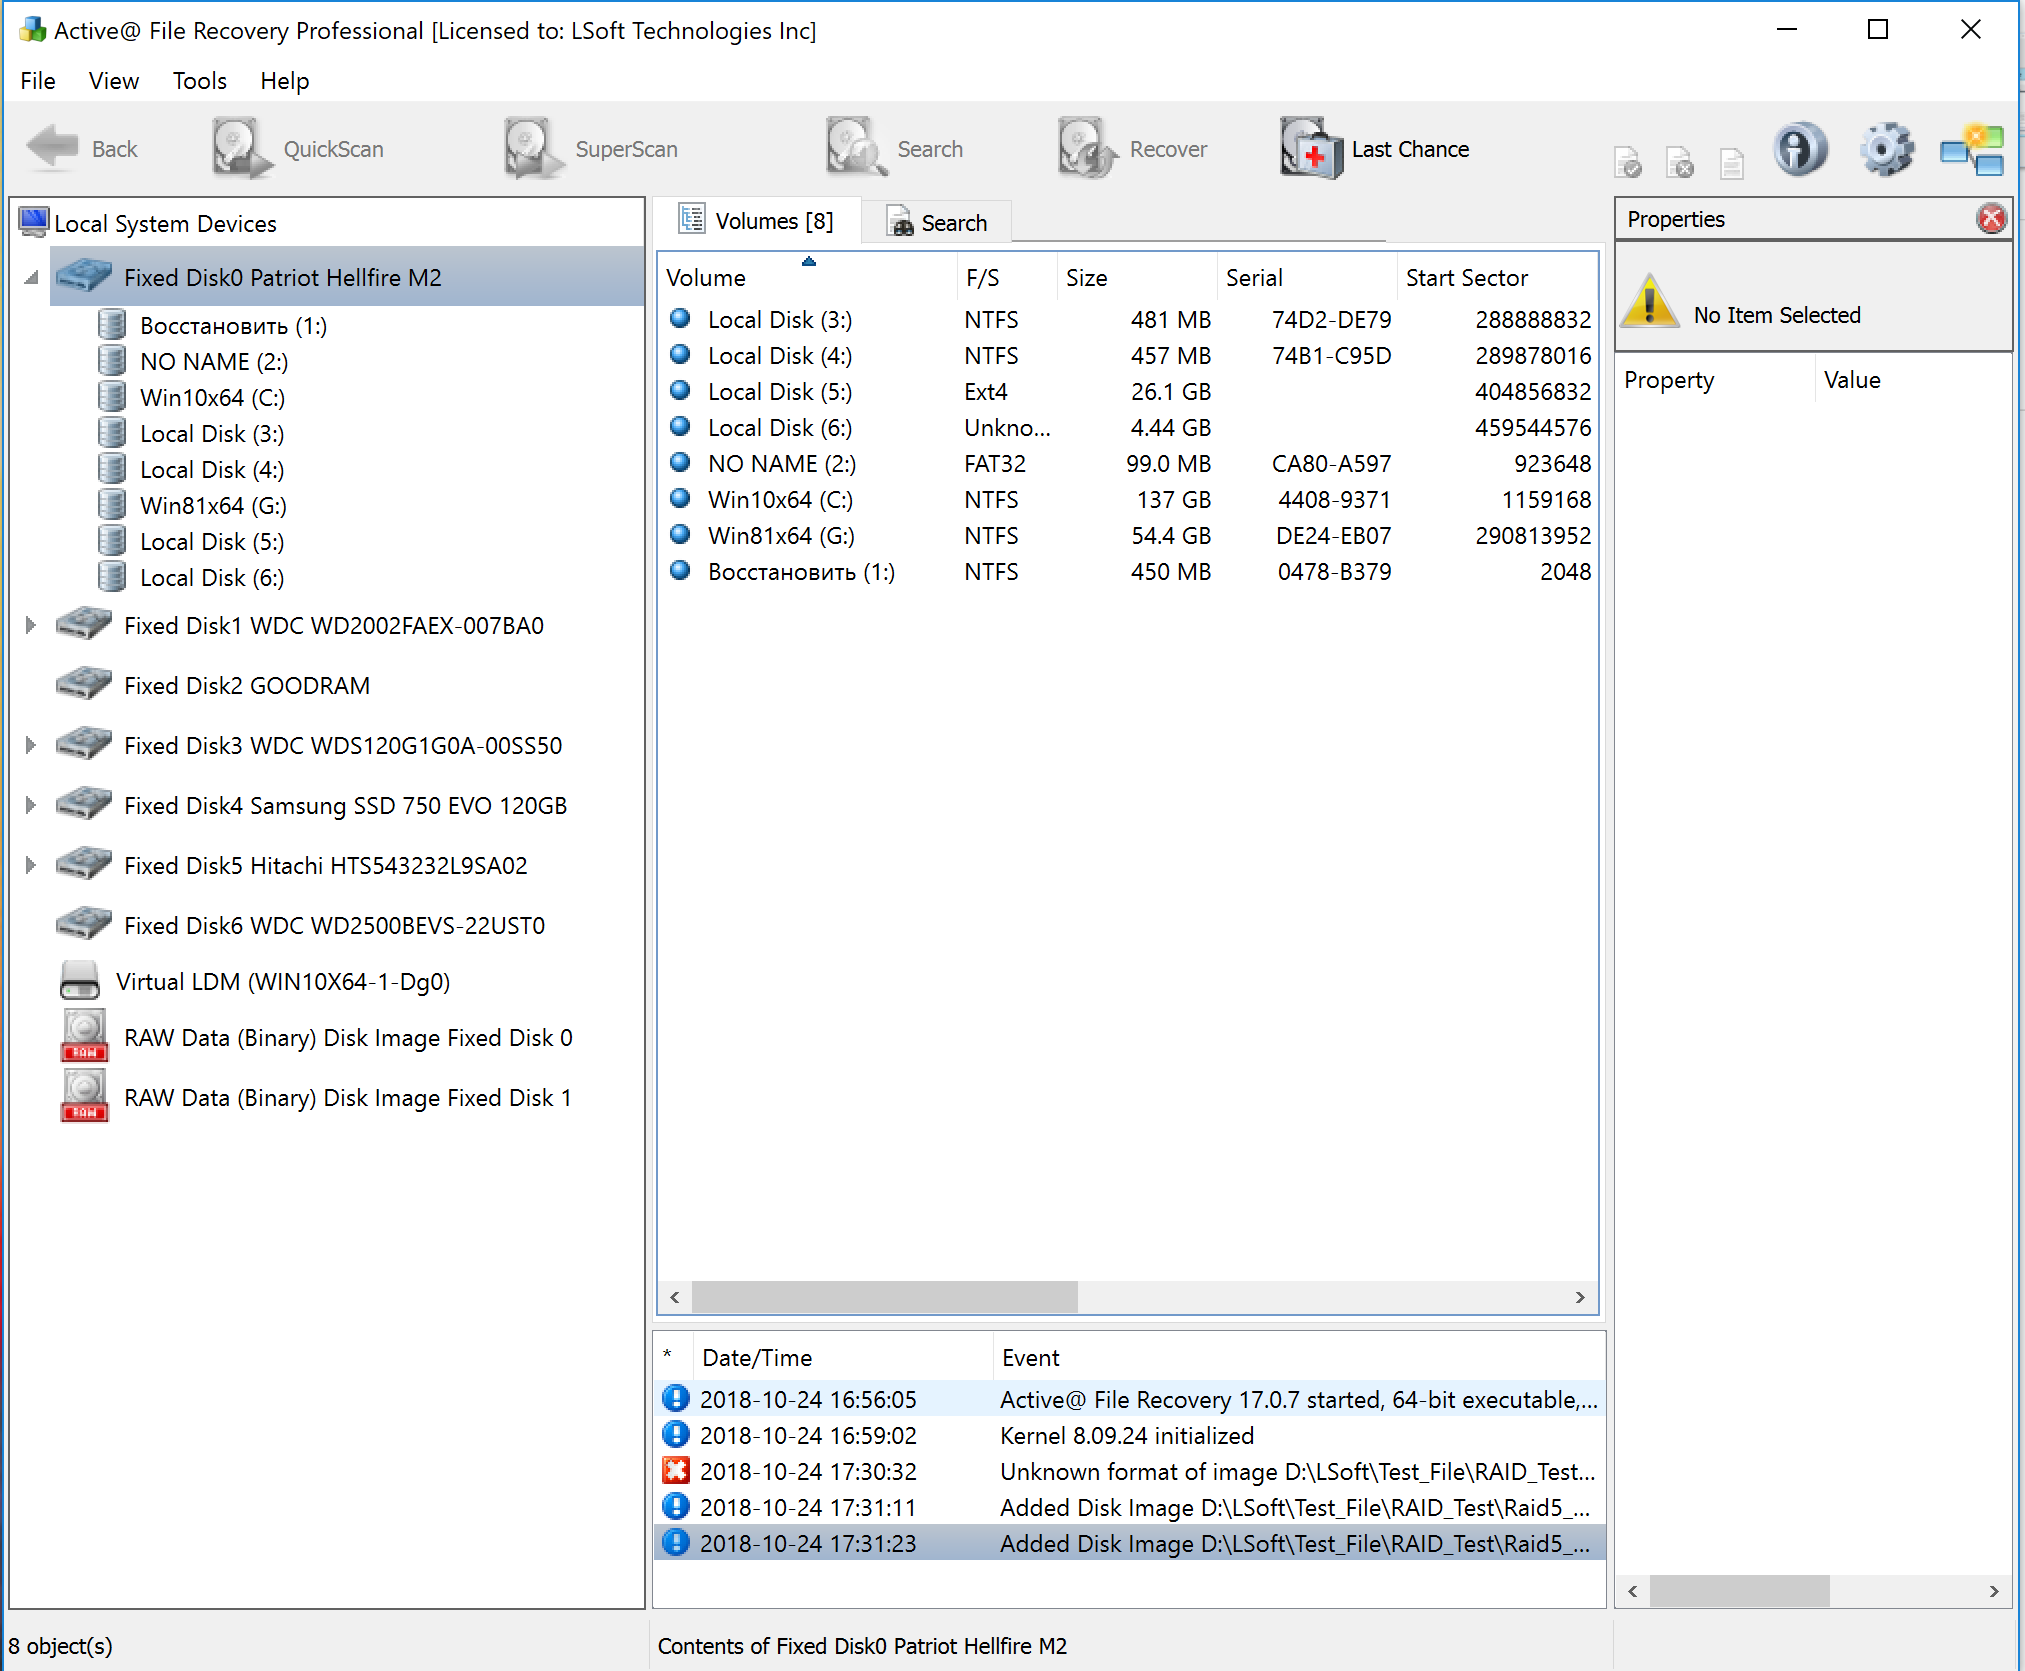
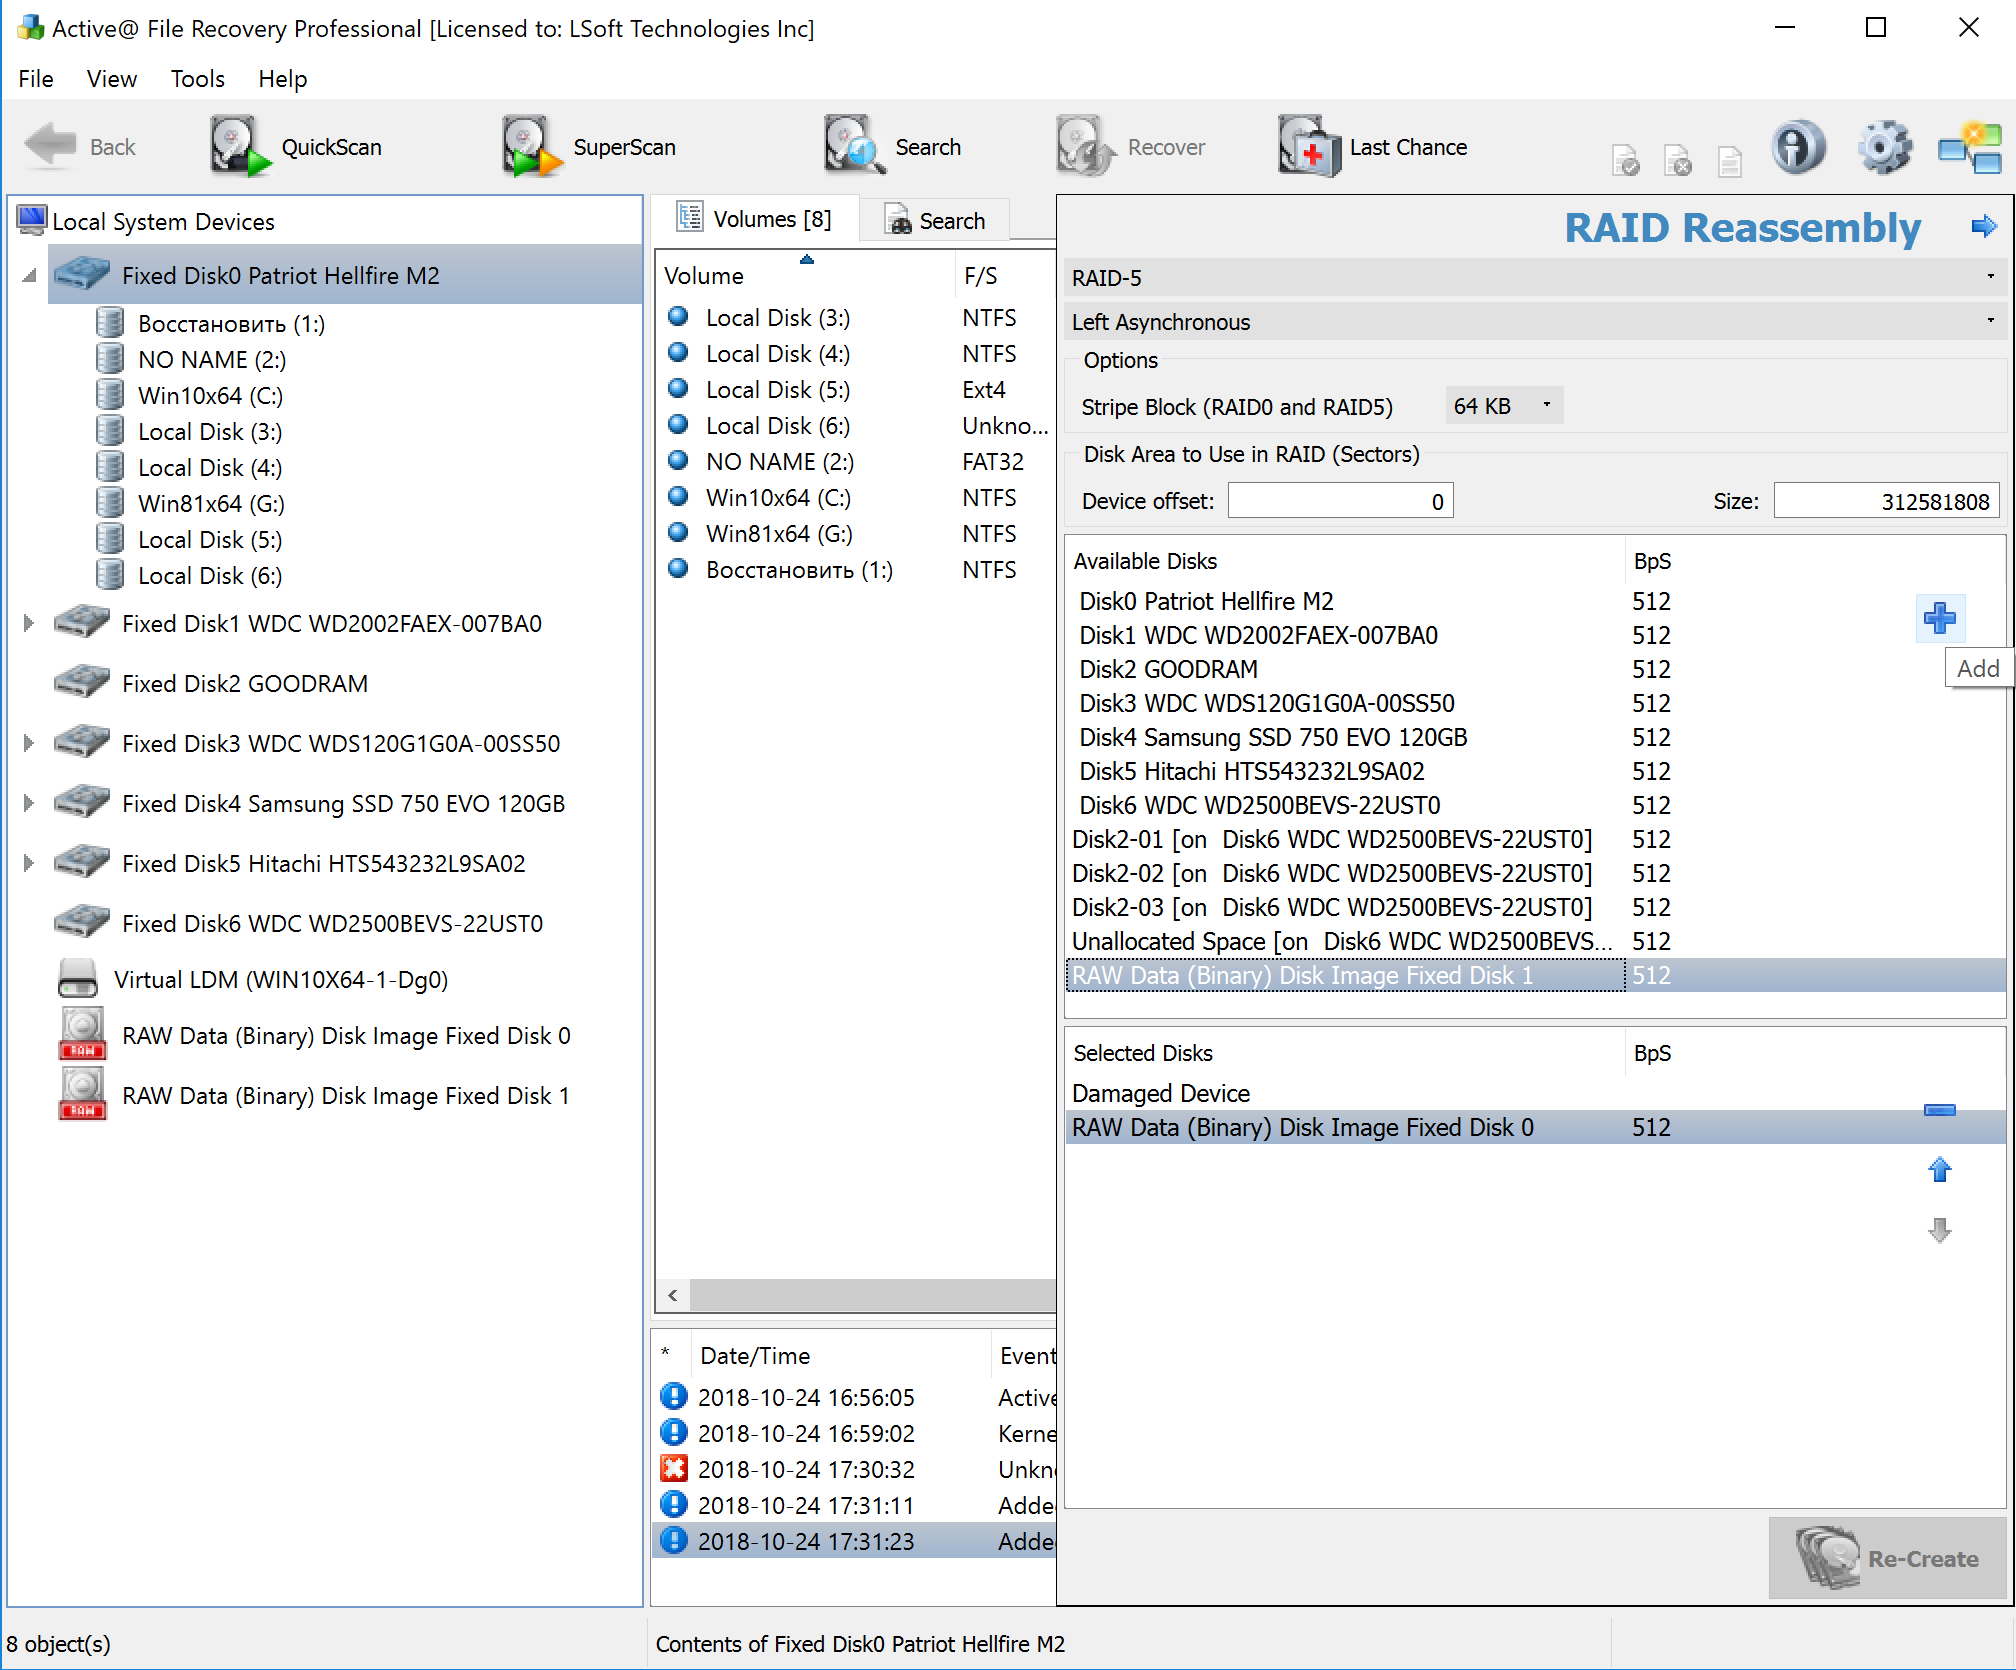
Now we need to run our Virtual Disk Array which will automatically recognize before mentioned images as parts of the RAID system.
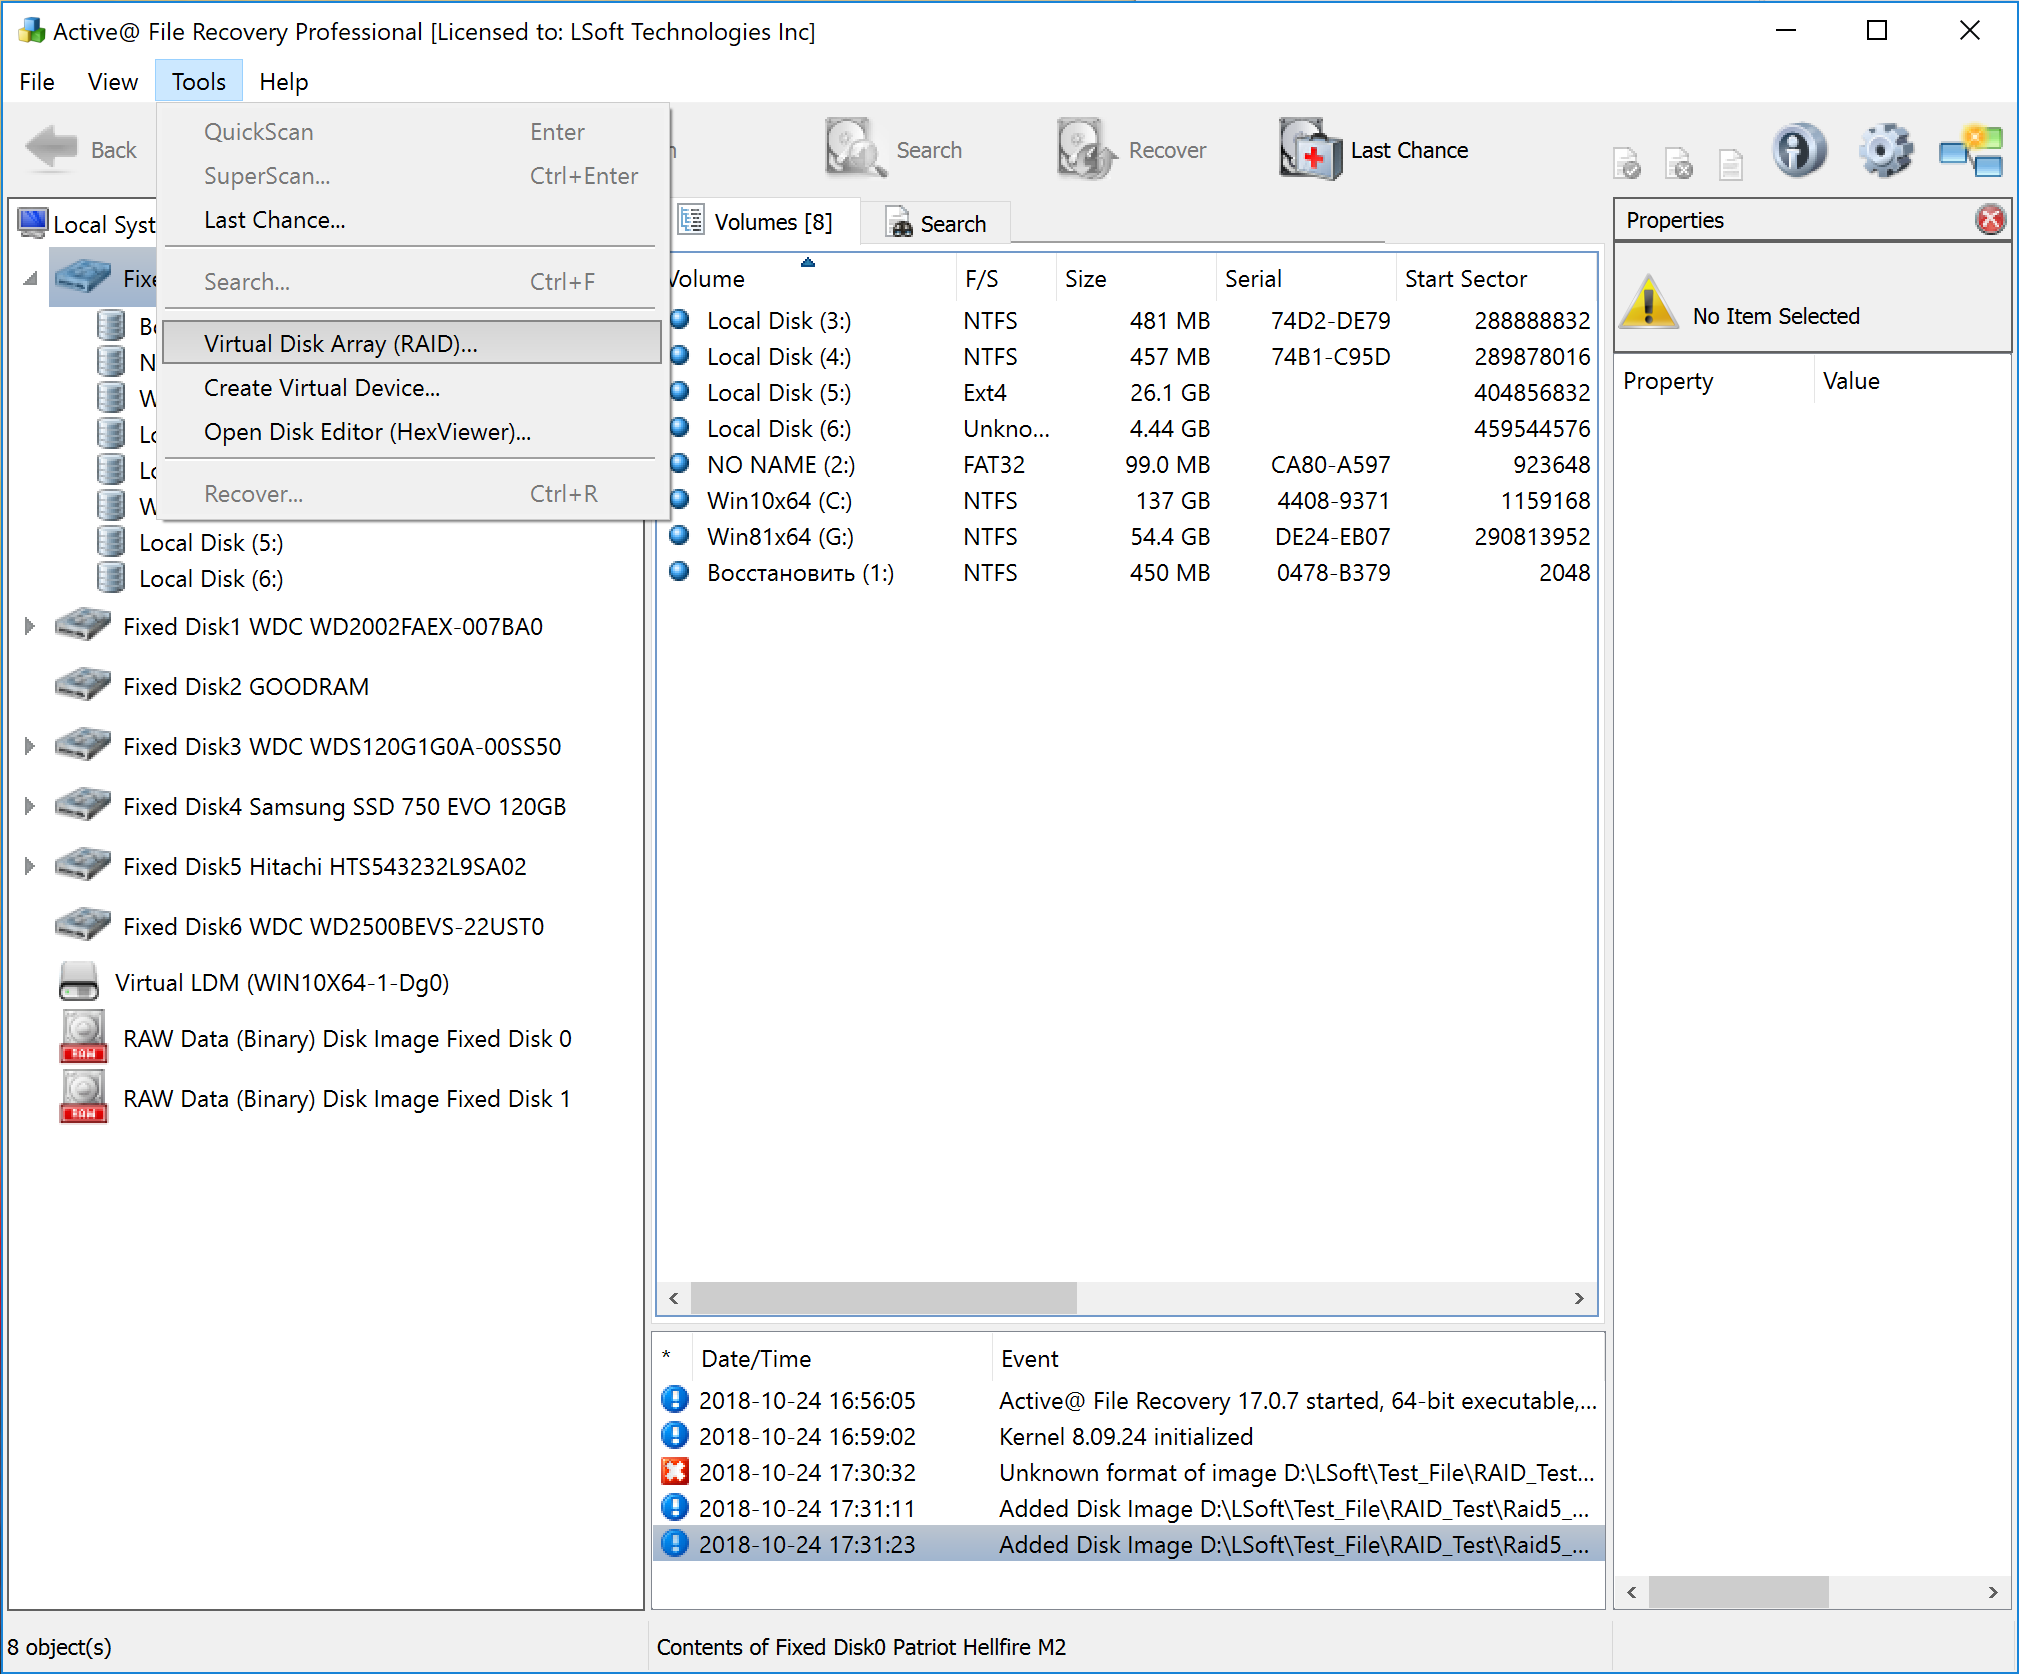
File Recovery identifies the RAID disk images and after adding them we will click on Re-Create to remake the damaged system.
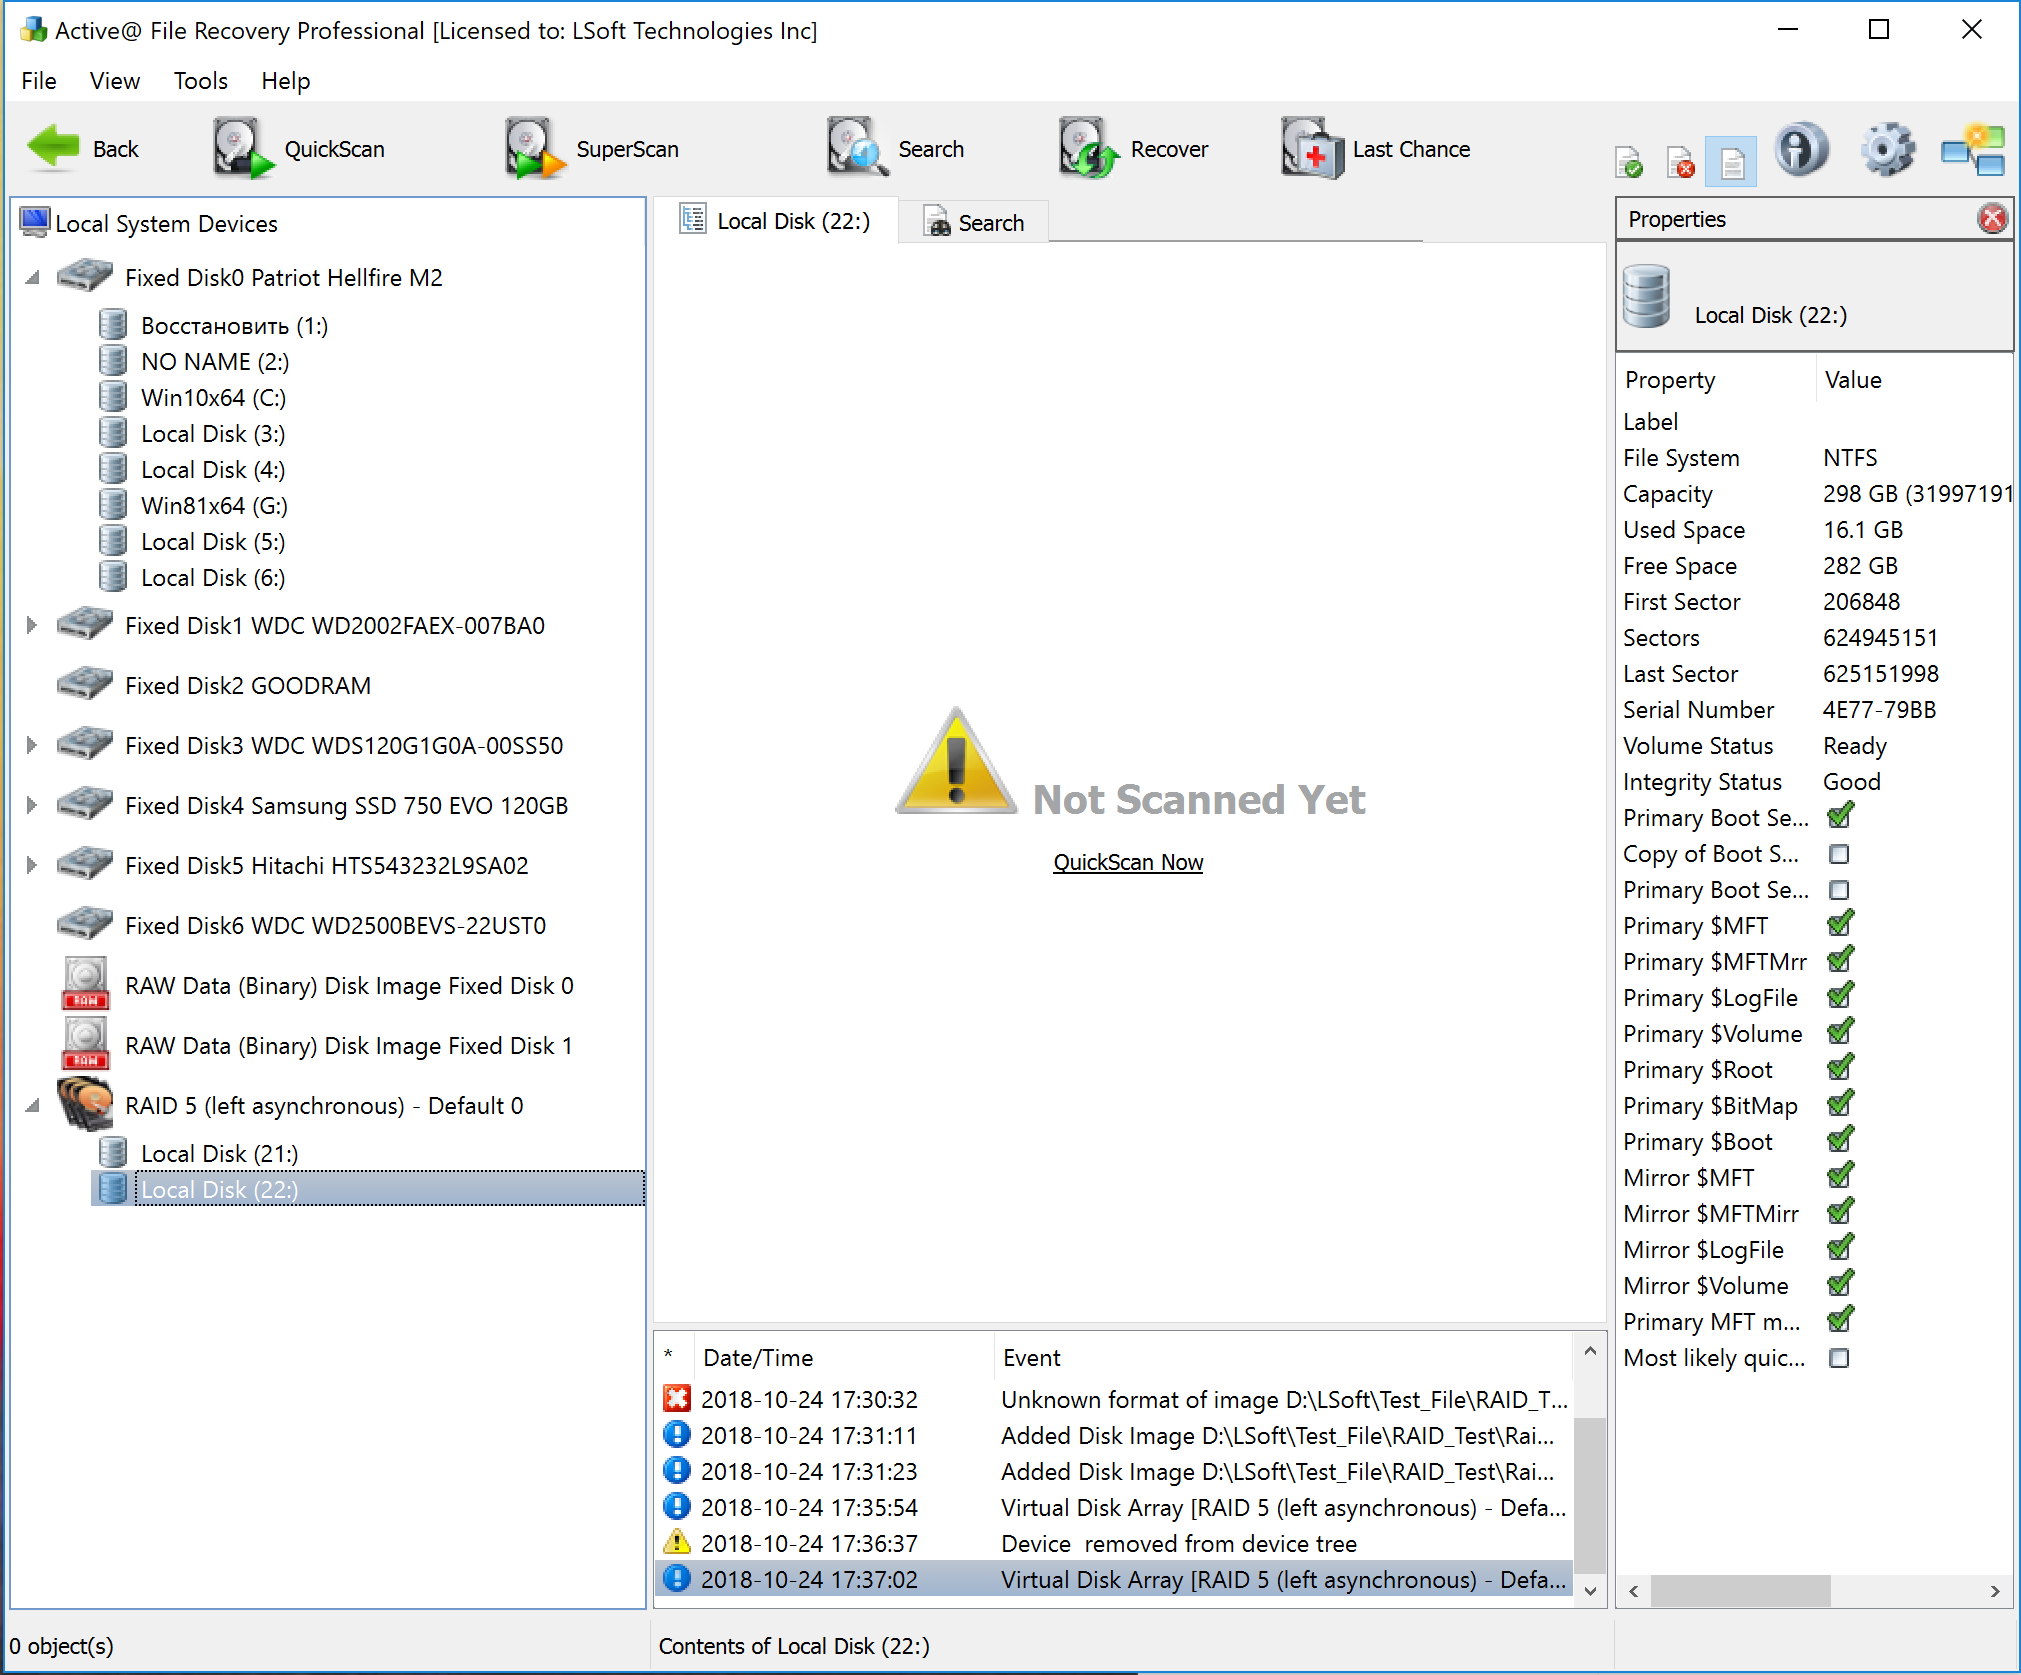
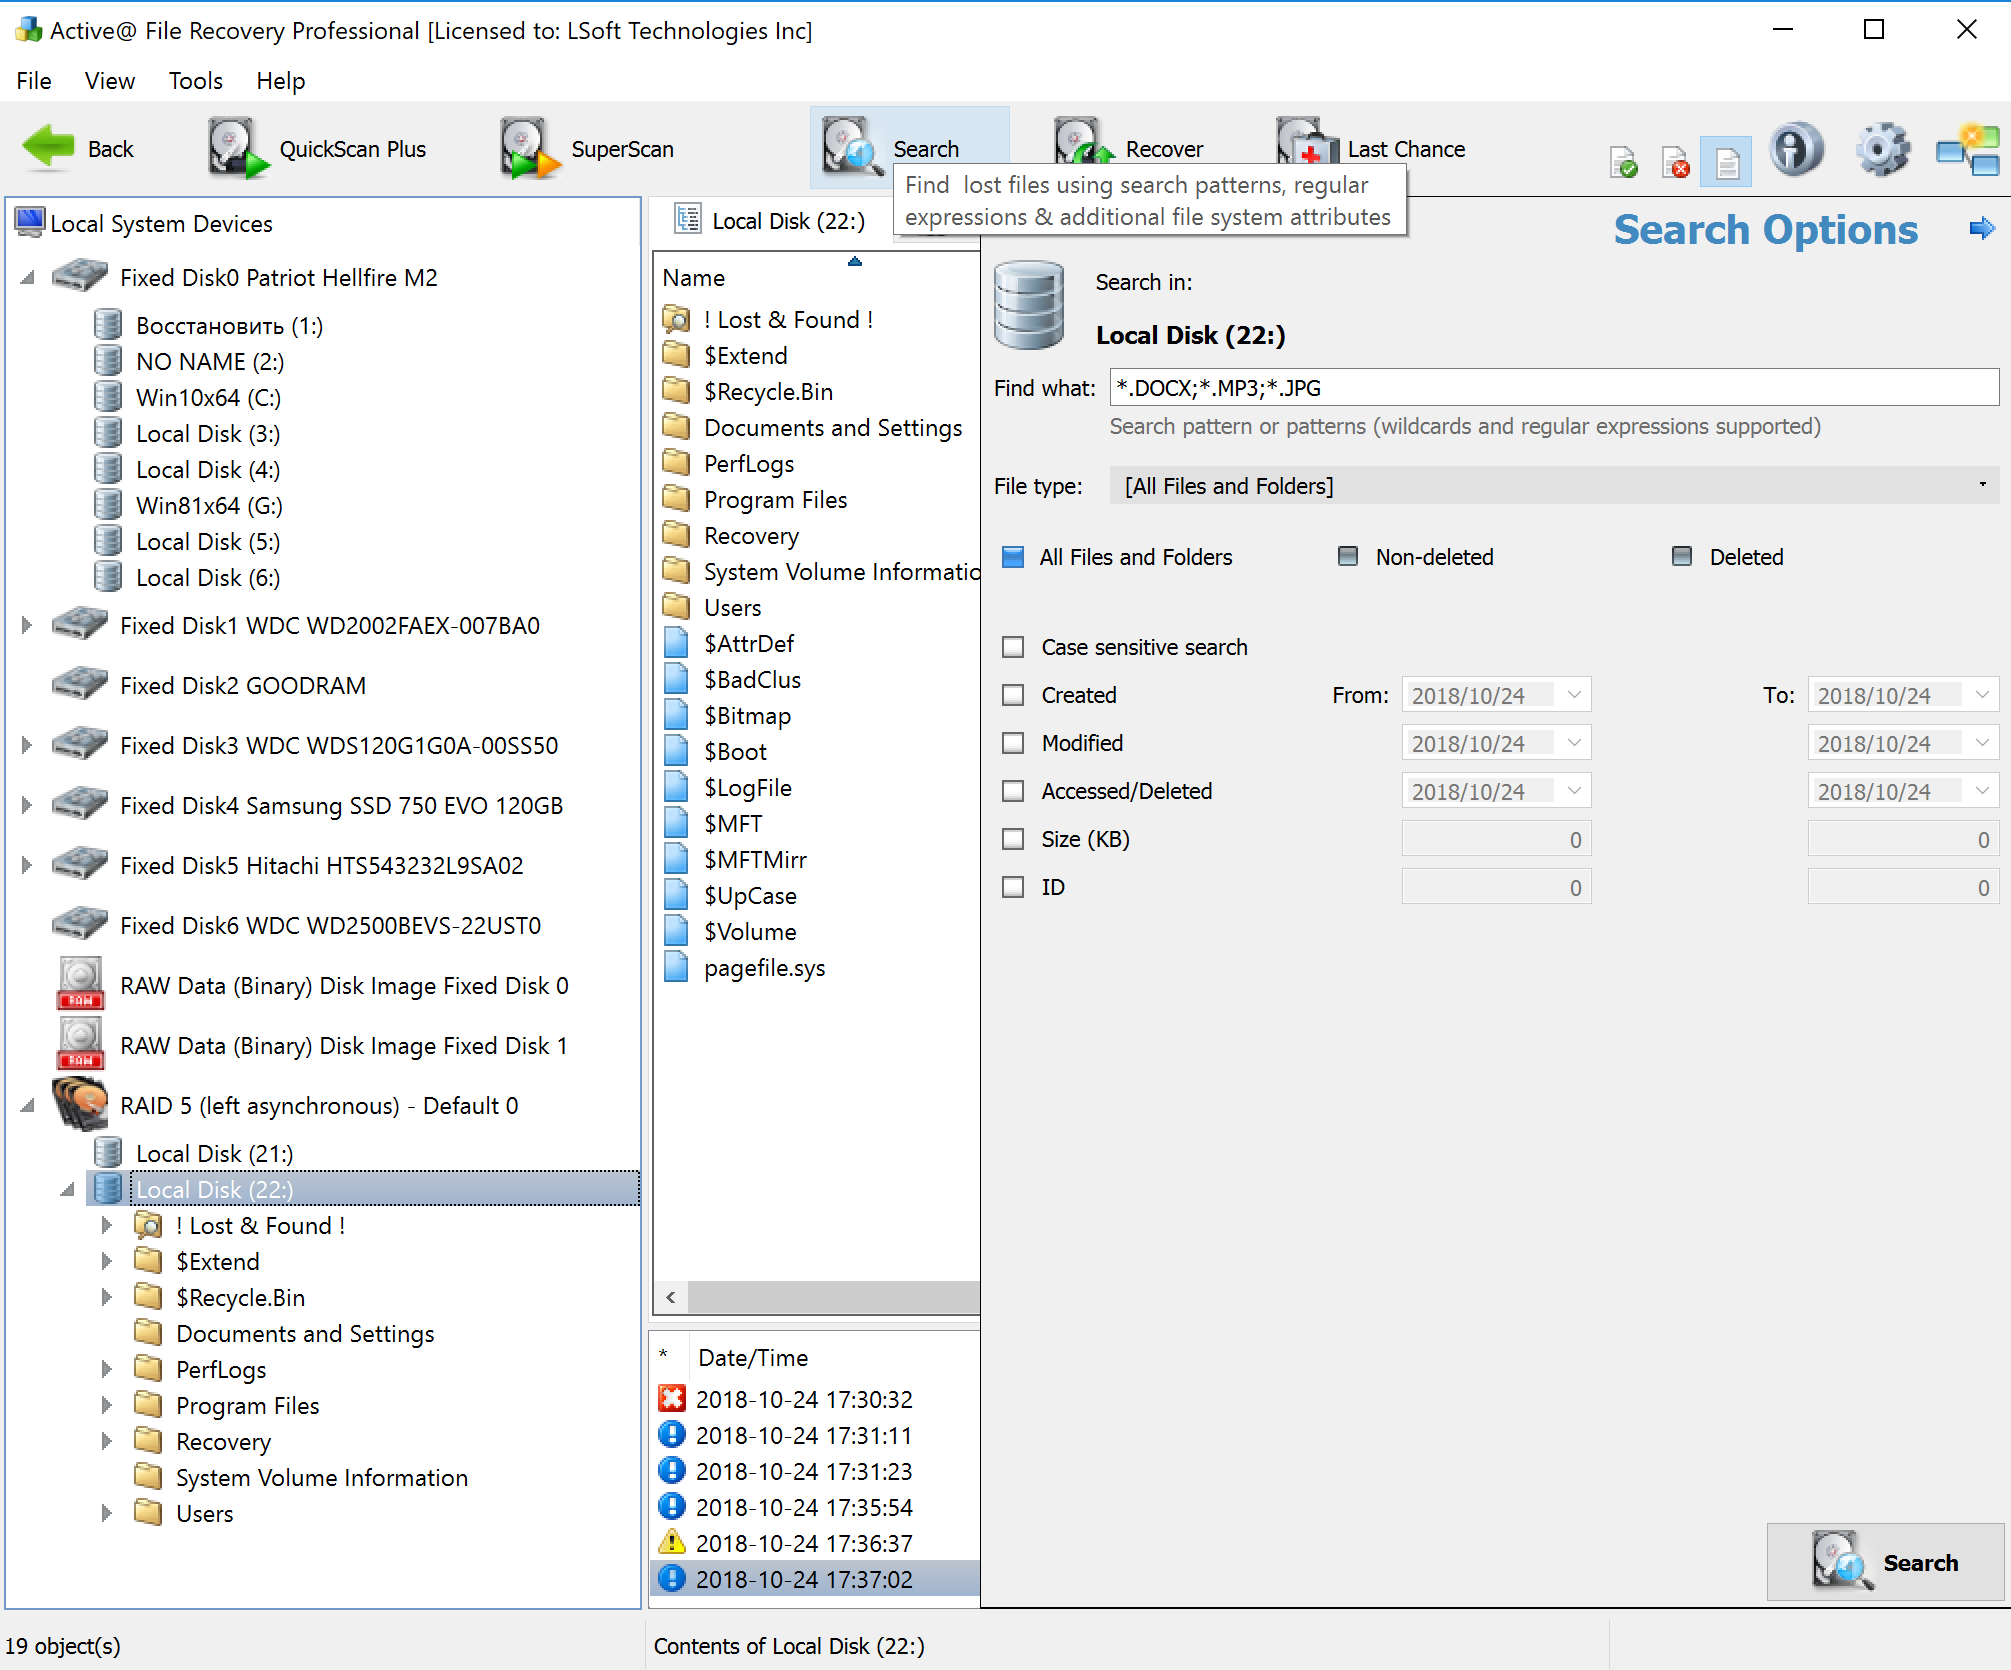
We now have a virtual RAID system from which we can recover data that was previously lost. All we need to do now is scan it again for the files that we require. In our case, we will be recovering some music files and images.
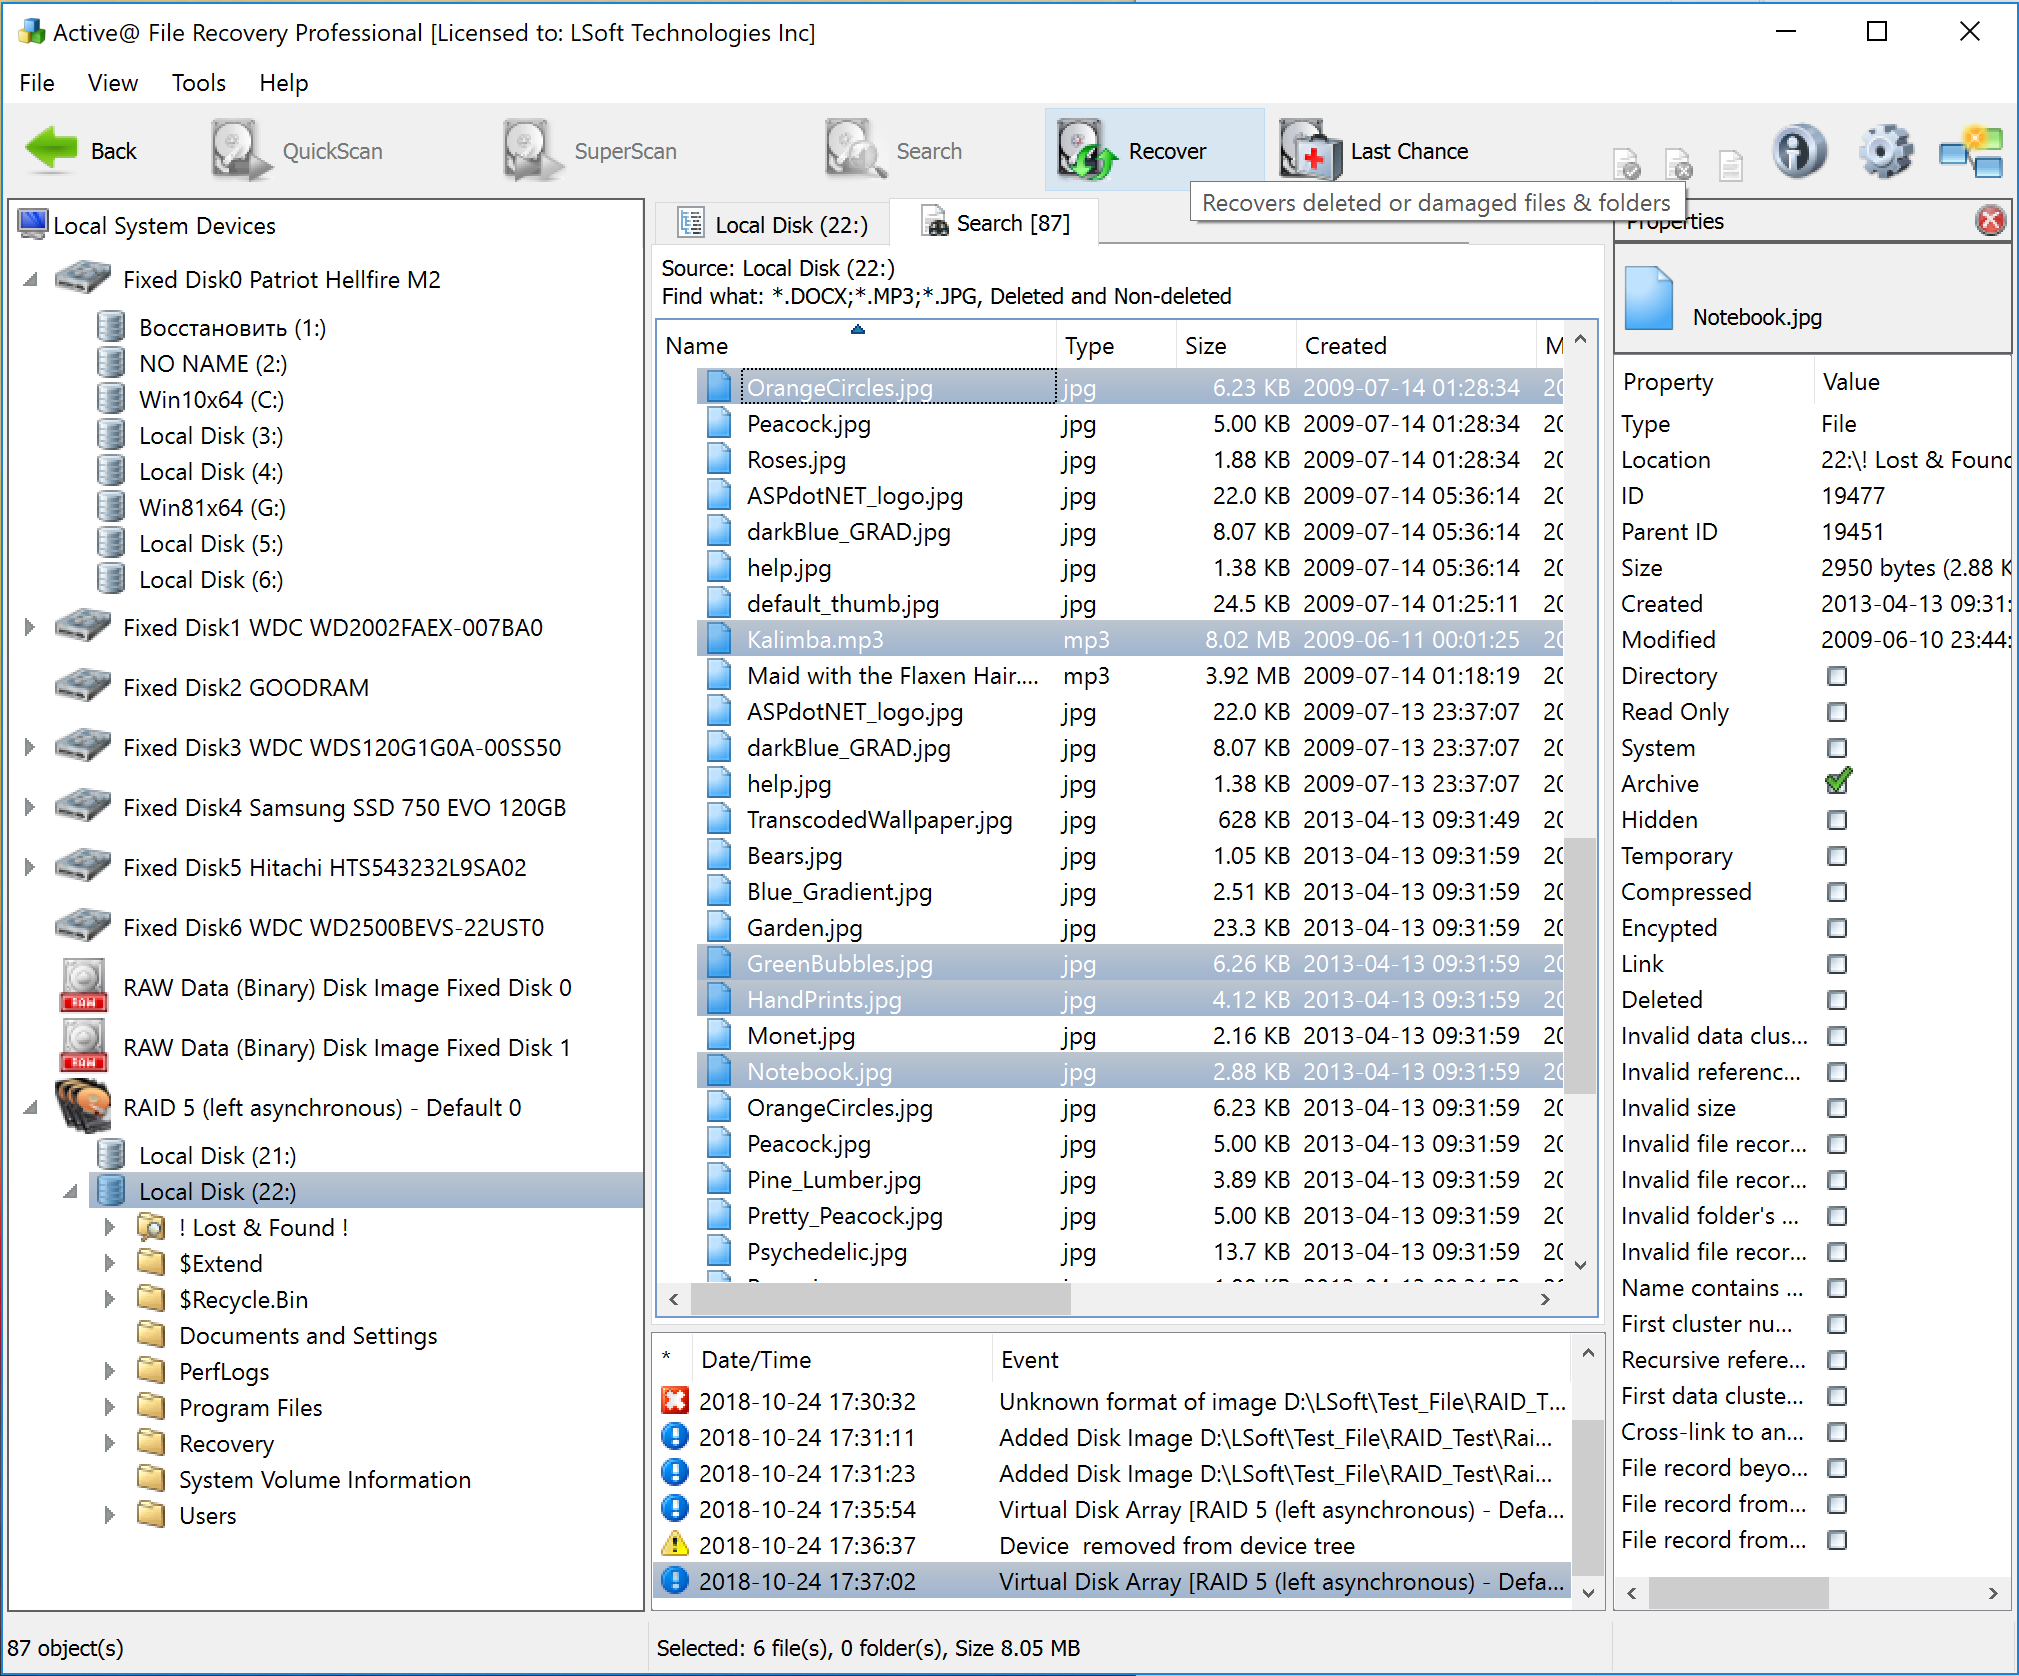
We will click on Search in the top panel and add the file signatures of the data that we want to recover.
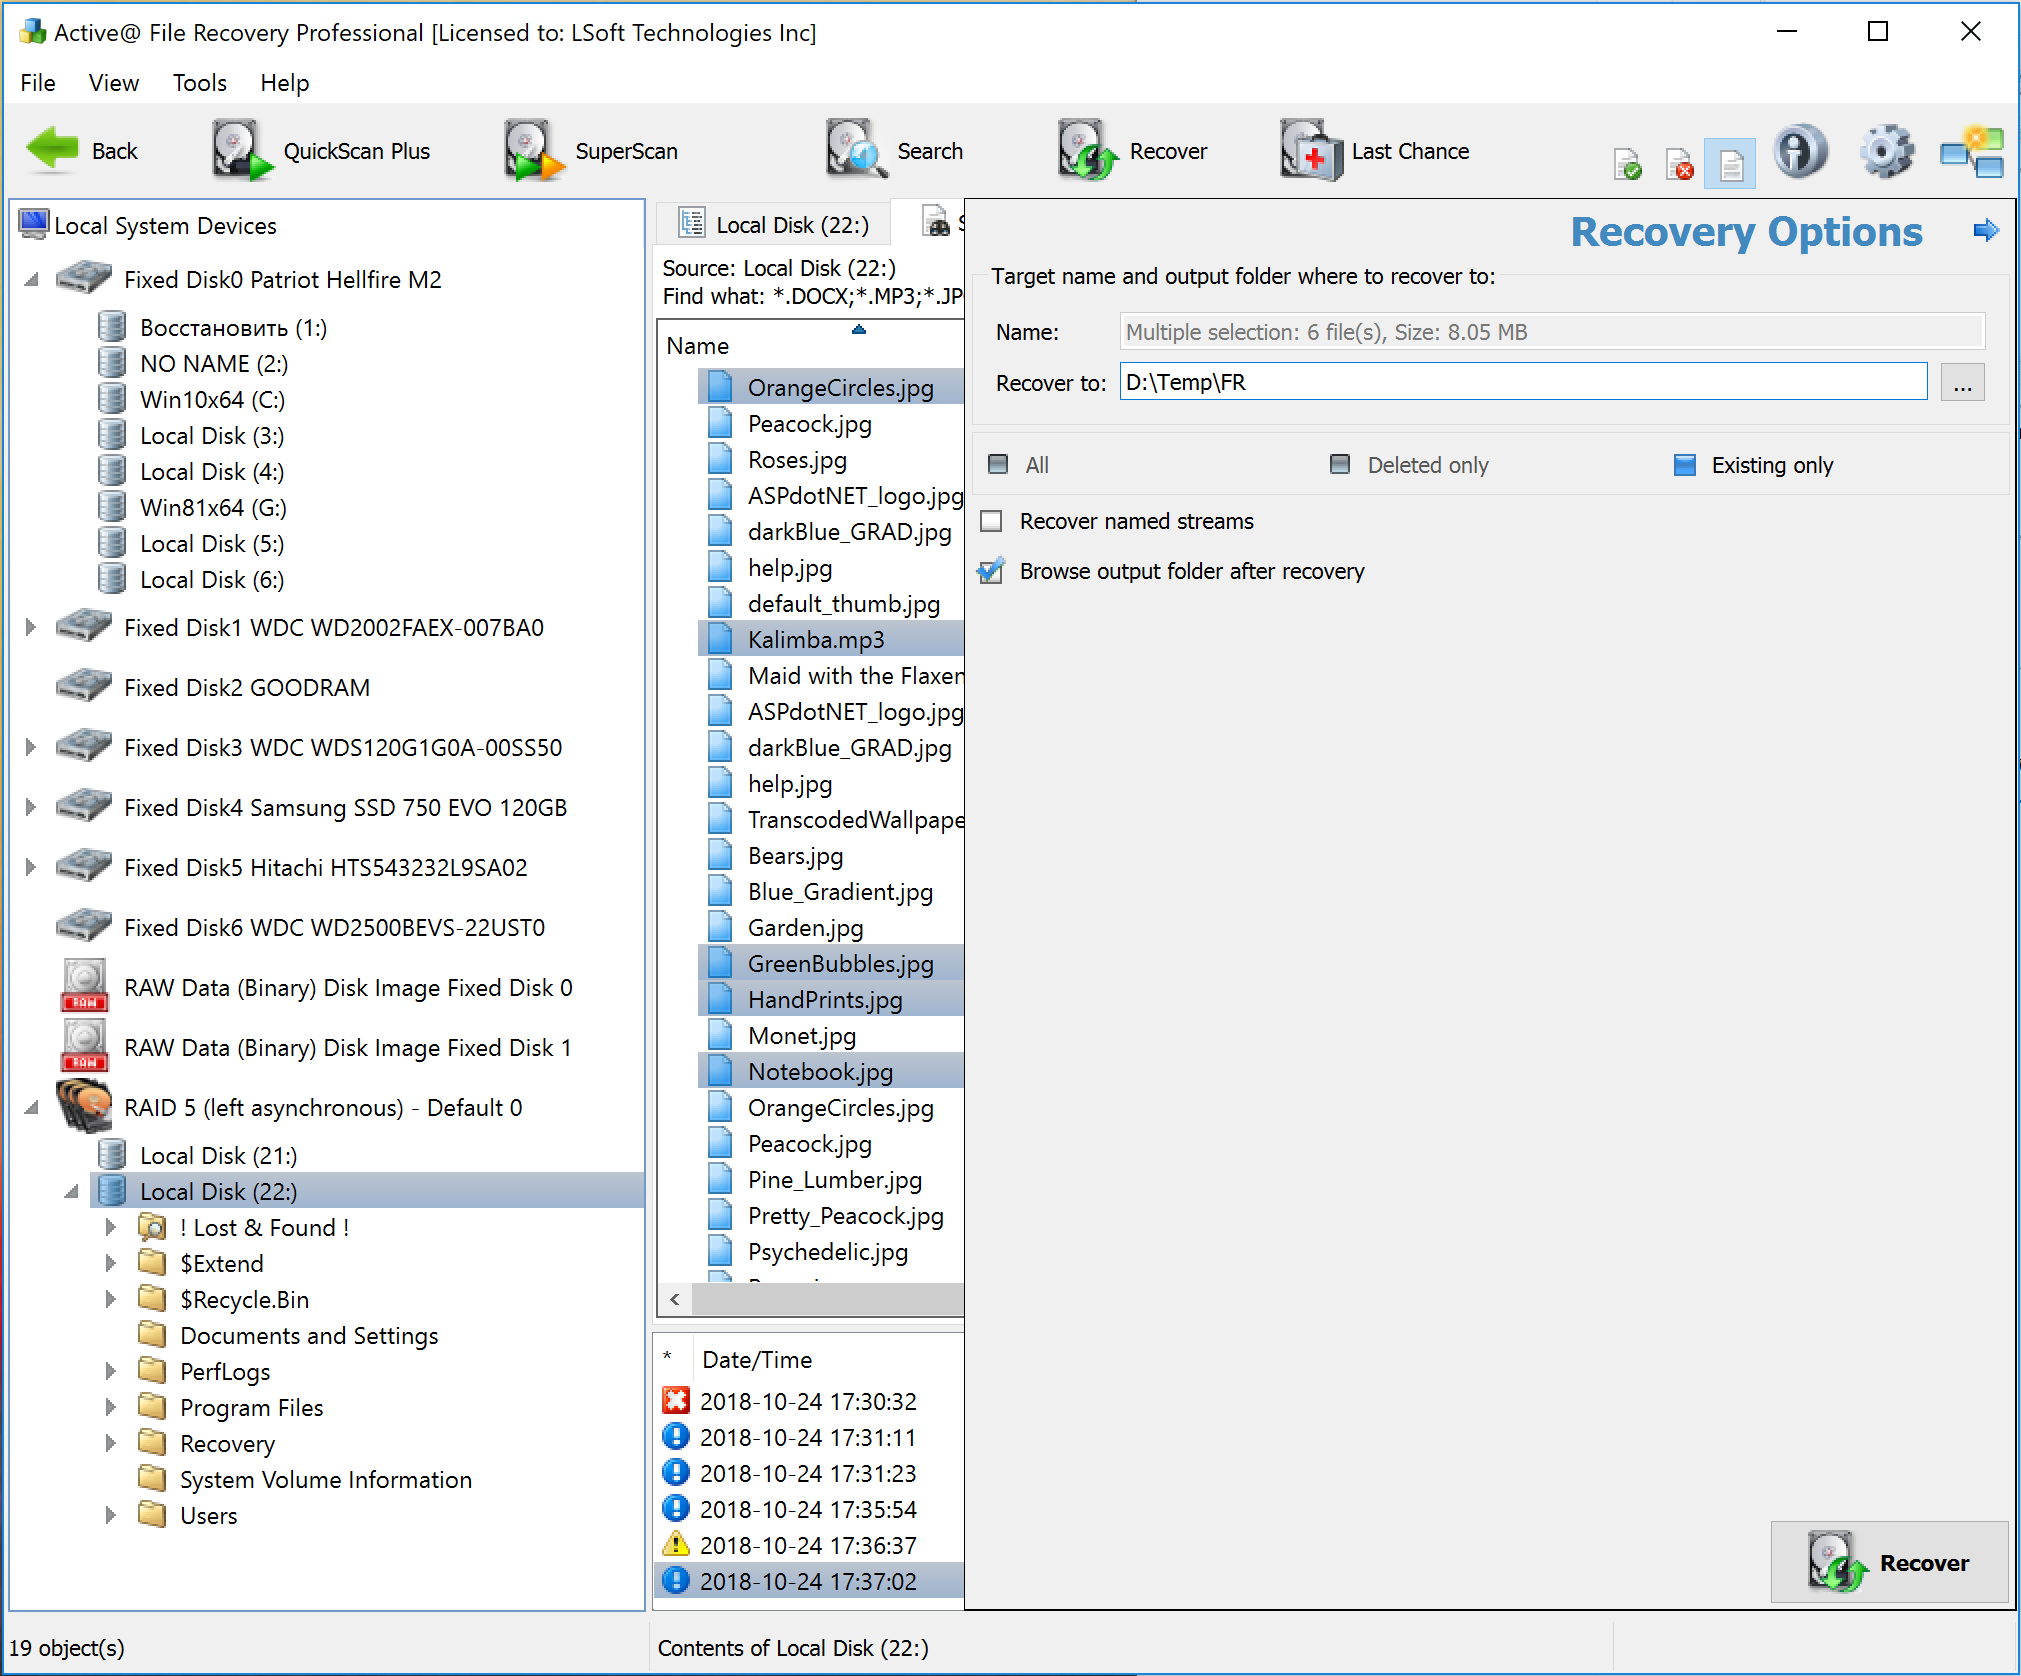
File Recovery has found the requested data all we need to do now is pick them and choose the recovery location.
Make sure to always recover files on a different drive from the one or ones they’ve originated.
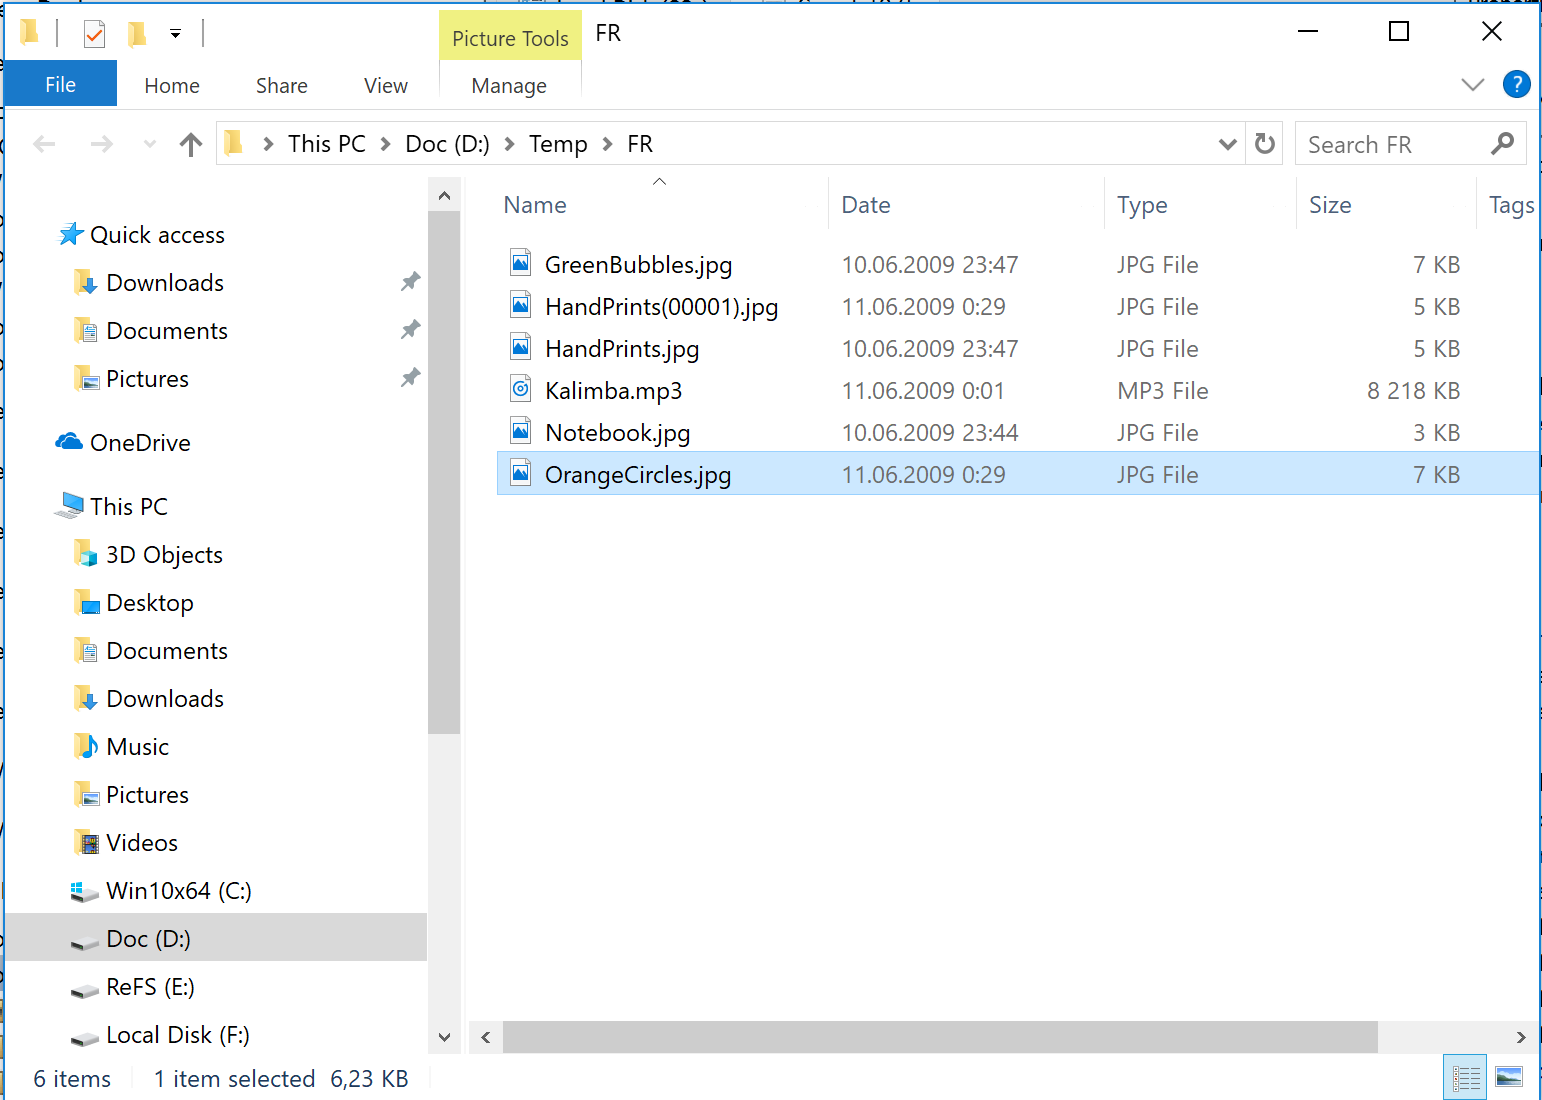
Finally, we have fully functional images that are ready for use.
Try File Recovery now!
Buy Active@ File Recovery Professional